Physical Address
304 North Cardinal St.
Dorchester Center, MA 02124
Physical Address
304 North Cardinal St.
Dorchester Center, MA 02124
Ginger root is an essential ingredient in the kitchens of all over the world and is renowned for its zingy taste and health benefits. Many people are unaware that this nutrient-rich spice is easily grown within your home or in your garden. If you have a large backyard or a tiny balcony, gardening at home ginger is an enjoyable project for anyone from beginners to experienced experts.
Its comprehensive guide will take you through each step of the procedure. We will guide you through choosing the best rhizomes for your needs and the particulars of gardening ginger, and the care required to ensure an abundance of harvest. You will be taught the basics of cultivating ginger, and how to transform the humble kitchen scraps into a flourishing, delicious plant. Let’s dive in and explore the exciting realm of growing ginger.
The process starts with choosing the correct ginger and then getting it ready to be planted. This crucial step is essential to ensure the success of your harvest.
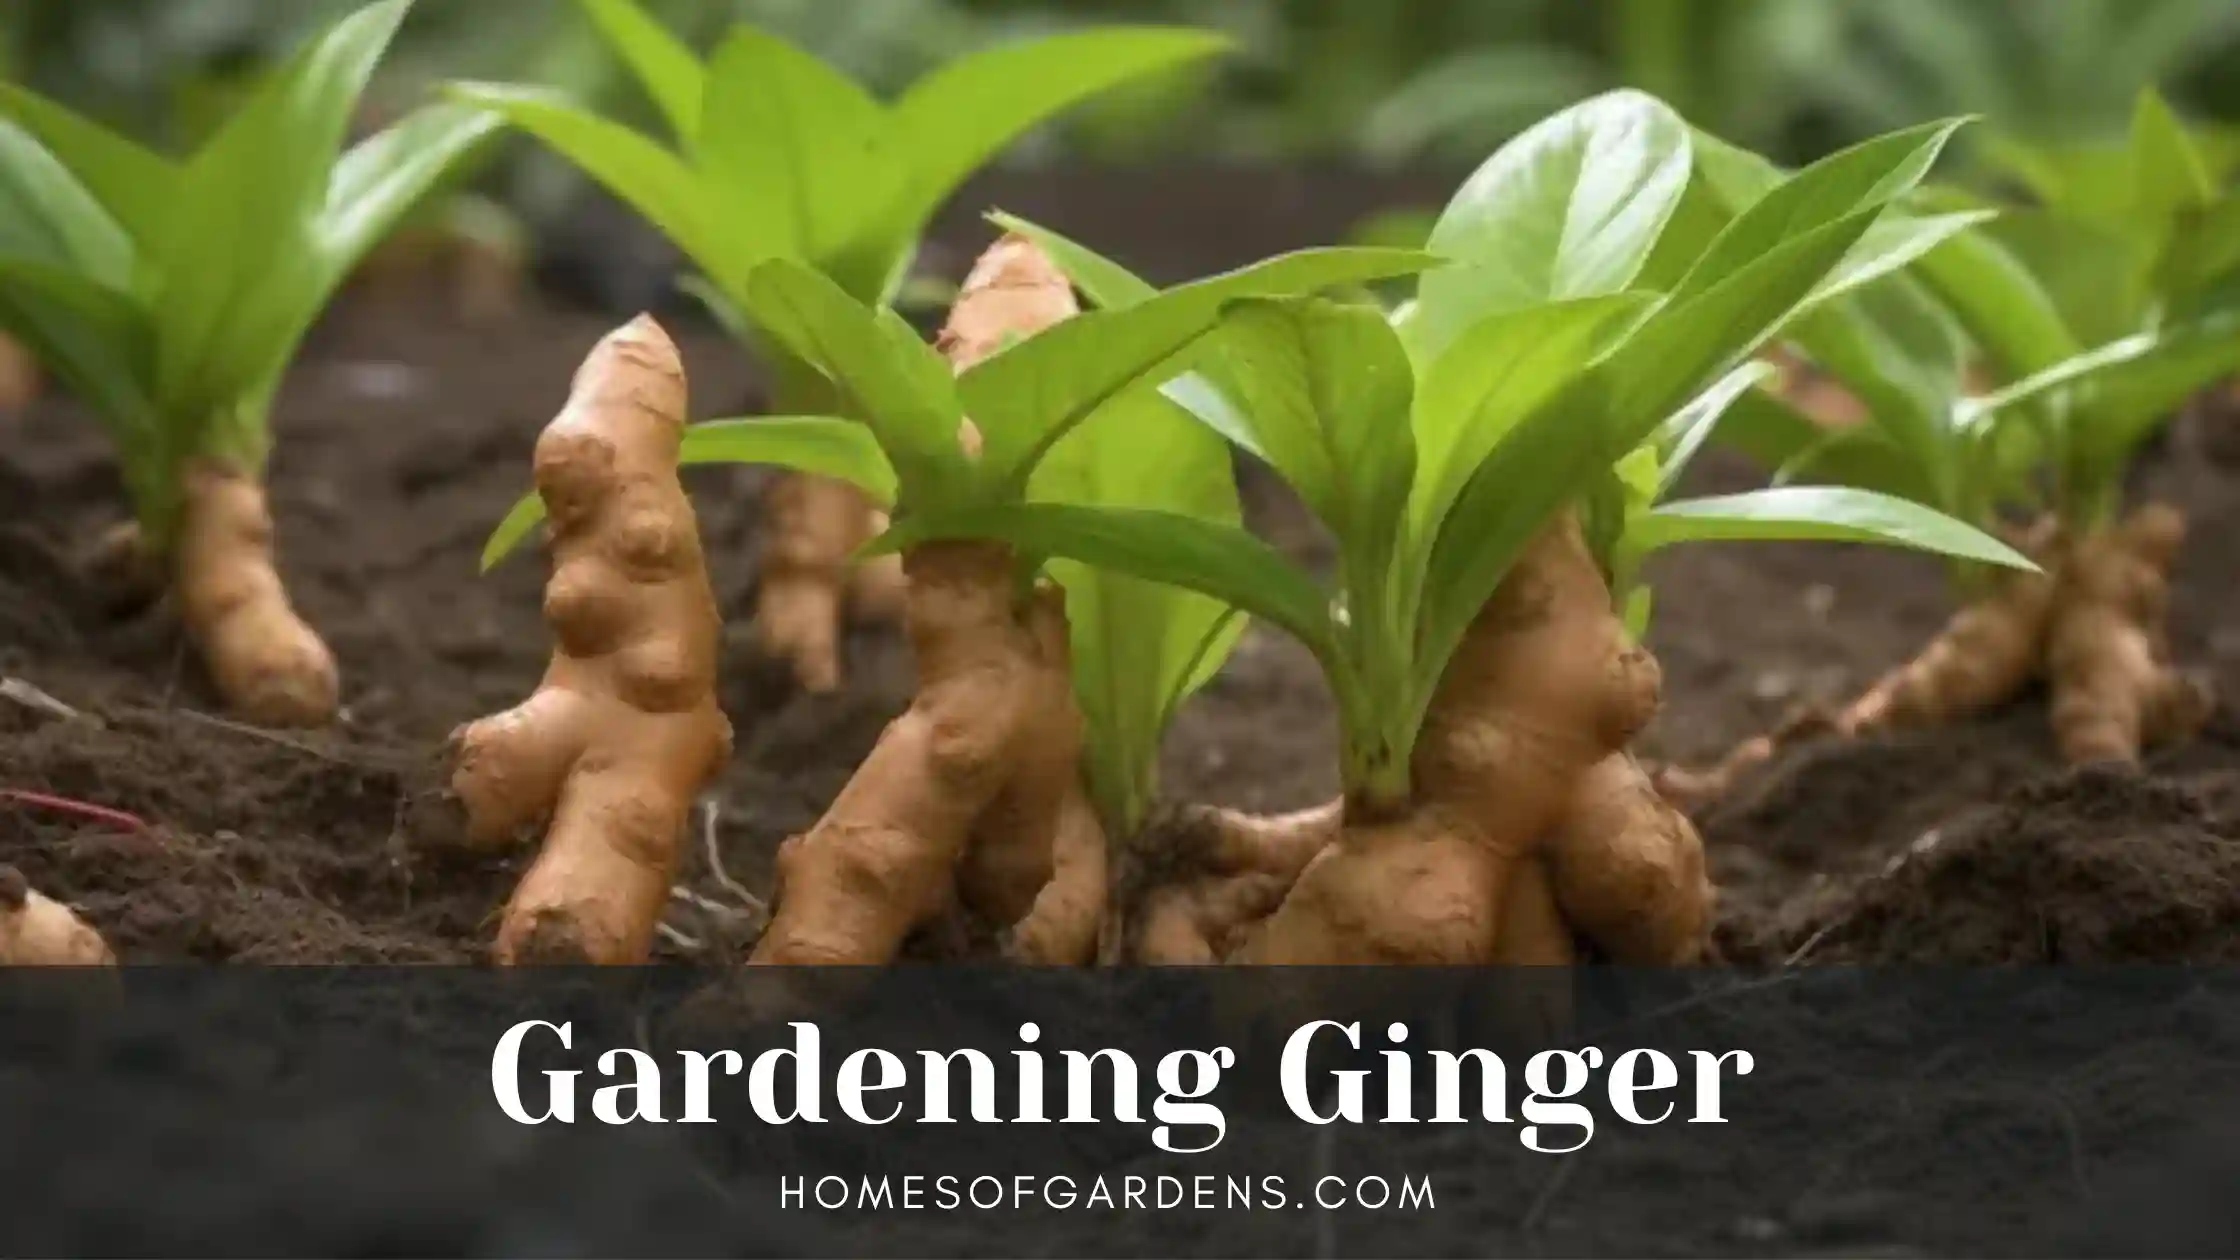
The key to success when gardening with ginger begins with a trip to the local grocery store or nursery. Find a ginger root technically called a rhizome that is firm, plump and has a smooth, soft skin. Beware of pieces which are shriveled, soft or smelly.
The most important thing to look out for are what are known as the “eyes” or small growth buds. These tiny nubs are the place they will be where the new shoots will begin to sprout. An item with a lot of visible eyes with well-developed eyes is the ideal choice for planting. If you can, opt for organic ginger. Ginger that is not organic is usually given a growth inhibitor in order to stop it from growing on the shelves of stores that could hinder your efforts to grow.
After you’ve got the rhizome of ginger, a little bit of preparation can allow it to grow. If you can’t locate organic ginger it is possible to let the root rhizome soak in water for a few hours to eliminate any growth hinderers.
Then, chop the rhizome into smaller pieces. Ensure that each piece is 2 inches in length and contains at least two or three growing buds that are healthy. After cutting, let the pieces rest in a dry area for a few days or. The cut edges create a callus that assists in preventing the rhizome from getting rotten when it is planted. This easy step is a professional method that is often employed for commercial farming of ginger to boost yield.
After you’ve got your rhizomes trimmed, now is the time to put them into the soil. It thrives best in humid, warm areas with well-drained soil and a little shade.
Ginger needs a fertile soil that is loamy and retains moisture and drains efficiently. A top-quality potting mix that has been amended by compost or manure that has been well rotted is the best choice. If using soil from your garden ensure that you mix in plenty of organic matter in order to improve the texture and fertility of the soil. The optimal pH of soil for ginger cultivation is slightly acidic, ranging between 5.5 between 5.5 and 6.5.
To grow in containers, pick an area that is large and fairly low in. The rhizomes of ginger grow horizontally therefore it is more important to have width than depth. A container which is 12 inches or more in width is sufficient space. Be sure that the container is full of drainage holes in order to avoid flooding, which is a main reason for root rot.
The method for planting ginger is simple. Place your ginger pieces that you have prepared approximately 2-4 inches deep in the soil. Place them in a position with the buds of growth pointing towards the upwards. If you are unable to determine which direction is upwards do not worry, just put the board flat so that the sprouts eventually find their way to the surface.
Place the pieces 6-8 inches apart, to allow each plant the room it needs for its roots to grow. In a pot, it is possible to plant a few pieces, depending on the dimensions. Once you have planted, water the soil thoroughly. It is important to be patient as it could take several weeks to get to see the very first shoots to appear.
Once your ginger has begun to sprout Once it has sprouted, constant care will help it grow into a productive, healthy plant. Ginger is a home gardener’s favorite. It’s low maintenance, however paying attention to the needs of your ginger will give you the best outcomes.
Ginger loves moisture. The soil must be always moist, but not too wet. The best general rule is to water extensively every time the top inch soil is dry. Limit watering in winter months, when plant growth slows down or it becomes dormant.
Since it is an arid tree, it also thrives in the high humidity. If you’re cultivating it in a greenhouse, specifically during the winter months when it is dry it is possible to increase the humidity by spraying the foliage with water every few times per week, or by placing your pot in a tray filled with pebbles that are filled with water.
Ginger prefers shade in partial shading or early morning sunlight. The intense, direct afternoon sun could scorch the leaves. A good spot would get around 2 to 5 hours of intense sun each day. If you’re indoors, the window in a location that isn’t squinting with direct light is the ideal choice.
A tropical plant, ginger thrives in warm temperatures. Its optimal temperature range for the growth of ginger is 70-85 degrees (21-29degC). It’s not frost-tolerant. If you reside in a region that has cold winters it is necessary to bring your ginger pot inside prior to when the frost is first appearing.
To encourage vigorous growth It’s recommended to feed your plant with fertilizer. Begin feeding it with a balanced liquid fertilizer every few weeks when it begins active growth. A low-nitrogen fertilizer like the one that is designed specifically especially for roots, can be a great option. It is also possible to supplement it with organic matter such as compost tea. You should stop fertilizing late in autumn as the plant is preparing to go into the winter dormancy.
This is the moment that you’ve been waiting to get! The process of harvesting fresh ginger from your garden is extremely satisfying. The timing and method of harvesting depend on how you want to utilize it.
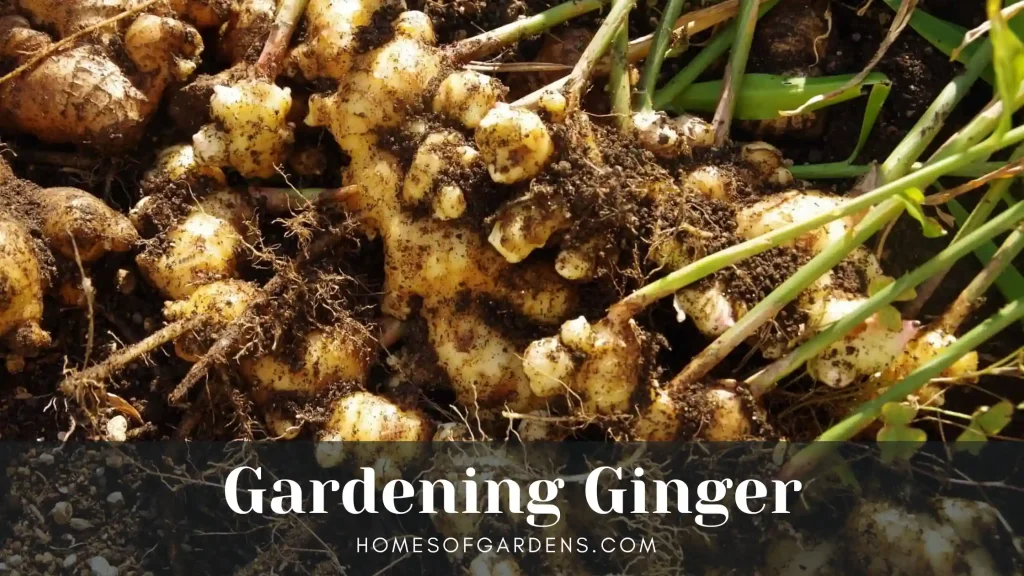
The ginger plant is ready for full harvest within 8-10 months after the leaves begin turning yellow and beginning to fall back. When this happens you will be able to take the entire rhizome structure.
But, you don’t need to wait for that long to enjoy the harvest. It is possible to begin “robbing” small pieces of ginger about four months after the start of growth. Be sure to carefully dig around the edges of the plant before cutting off a small portion from the rhizome. Then, you can change the soil and the plants will develop. Young ginger is delicate with a milder flavor and a less fibrous texture. ideal for picking or candying.
To harvest the main crop take a gentle lift of the entire cluster of rhizomes out of the soil. Clean the dirt off and clean them.
After harvesting, you can use your ginger fresh right away. For storage purposes to use later, you must first let the rhizomes dry for a few days in a ventilated area.
To store it for a short period (a couple of weeks) it is possible to store ginger that has not been peeled in a tin bag or container inside the crisper drawer in your fridge. To store it for longer, ginger freezes extremely well. You can store entire, unpeeled rhizomes in the freezer bag. If you require a few you can simply grate ginger that has been frozen (no need to defrost) and then return the remainder in the freezer. You can also cut and peel the ginger prior to freezing it in chunks.
Don’t be forgetting to save some of the most healthy-looking rhizomes that have strong growth buds, to begin your next crop. This will allow you to continue the cycle of farming ginger within your home.
Q1: Can I grow ginger from a store-bought root?
Yes, you absolutely can! Choose a plump, healthy rhizome with visible growth buds. Opting for organic ginger is best, as conventional ginger may be treated with sprout inhibitors.
Q2: How long does it take to grow ginger?
It takes approximately 8-10 months for a ginger plant to mature fully for a large harvest. However, you can start harvesting small pieces of “young” ginger after just 4 months.
Q3: Does ginger need full sun?
No, ginger prefers partial shade. It thrives with a few hours of morning sun but can be damaged by intense, direct afternoon sunlight. A location with dappled light is ideal.
Q4: Why are the leaves on my ginger plant turning yellow?
Yellowing leaves can be a sign of a few things. If it’s late in the growing season (after 8+ months), it’s a natural sign that the rhizomes are mature and ready for harvest. If it happens earlier, it could indicate overwatering, underwatering, or a nutrient deficiency. Check your soil moisture and fertilizing routine.
Q5: Can I grow ginger indoors?
Yes, ginger is an excellent plant for indoor gardening. Use a wide, shallow pot with good drainage and place it near a window that receives bright, indirect light. It’s a great way to have fresh ginger year-round, especially in colder climates.
Gardening ginger is a straightforward and rewarding experience that connects you with the root for your meals. From the carefully selected choice of a rhizome, to the moment of satisfaction when you harvest, the whole process is the opportunity to learn hands-on about cultivating plants. All it takes is an ideal soil, consistent moisture and a lot of patience.
No matter if you’re a seasoned gardening expert or are just beginning with your garden, cultivating ginger is a straightforward venture that produces amazing outcomes. Following the guidelines in this tutorial to grow ginger, you will be able to successfully cultivate this incredible spice that will bring fresh, tangy flavor to your cooking and a hint of tropical to your living space. We suggest you buy a root of ginger during your next shopping trip and try it. You may find your new most loved plant to cultivate.